-
NeoRedZ
on
22 Mar 19 @ 09:17 PM #
@rufnek: pwede kaya ganyan style sa isang 32inch LED tv? sira na kasi yung system board at wala na makitaang replacement
-
awakeruze
on
22 Mar 19 @ 09:44 PM #
^
I depends on the controller. Usually you can ask the seller if the controller is compatible with your LCD, so you have to know the actual brand/model of the LCD panel inside the TV.
It's best to find a datasheet so you'll know what kind of connector it has, as well as the pinout.
He mentioned that he needed to modify his cable in order to match the pinout of his screen.
-
NeoRedZ
on
22 Mar 19 @ 10:14 PM #
now it gave me hope kasi may sirang LG 32LE5500 ako na nakatambak lang dito sa bahay, taon na din binilang nito at ngayon lang ako naging aware na may universal boards na pala and good thing meron pang datasheet nito sa net
-
rufnek
on
26 Mar 19 @ 06:10 AM #
@NeoRedZ check the specs if supported yung monitor size mo but mas maganda driver board na specific sa lcd model para salpak nalang. Also it depends kung sira na mismo yung board ng lcd useless din pero it's worth a try.
Mukhang dual lvds yung model mo pre not sure about that..
<click here for link>
Arduino Ref Timer

3hrs off / 9hrs on
2channel relay
/*
Ref & laptop charger timer by rufnek
Ref = 9hrs on & 3hrs off
Laptop = 1hr on 1hr off
*/
//ref constants
unsigned long ref1 = 32400; //9hrs
unsigned long ref2 = 10800; //3hrs
//laptop constants
unsigned long lpt1 = 3600; //1hr for laptop charging
unsigned long lpt2 = 3600; //unsused, can be set to 30min or anything
//timer initializations
unsigned long time_nowref1 = 0;
unsigned long time_nowref2 = 0;
unsigned long time_nowlpt1 = 0;
unsigned long time_nowlpt2 = 0;
// the setup function runs once when you press reset or power the board
void setup() {
time_nowref1 = 0;
time_nowlpt1 = 0;
pinMode(PC13, OUTPUT);
pinMode(PA6, OUTPUT); //led
pinMode(PA5, OUTPUT); //ref
pinMode(PA4, OUTPUT); //laptop
}
// the loop function runs over and over again forever
unsigned long n=1;
unsigned long x=1;
void loop() {
int s = millis()/1000; //convert millis to seconds
if(s > time_nowref1){ // if current time is greater than ref timer 1
if(n % 2){ //if have remainder
time_nowref1 = s + ref1; //set timer to 9hrs
digitalWrite(PA6, HIGH); //set PA6 to 5v
digitalWrite(PA5, HIGH); //set PA5 to 5v
}else{ //no remainder
time_nowref1 = s + ref2; //set ref timer to 3hrs
digitalWrite(PA6, LOW); //set PA6 to 0v
digitalWrite(PA5, LOW); //set PA5 to 0v
}
n++;
}
if(s > time_nowlpt1){ //is current time > laptop timer 1
if(x % 2){ //do we have remainder?
time_nowlpt1 = s + lpt1; //set laptop timer current seconds plus laptop timer 1
digitalWrite(PA4, HIGH); //set PA4 to 5v
digitalWrite(PC13, HIGH); //set PC13 to 5v
}else{ //we dont have remainder
time_nowlpt1 = s + lpt1; //set laptop timer to current seconds plus laptop timer 1 (or 2 if you want different time)
digitalWrite(PA4, LOW); //set PA4 to 0v
digitalWrite(PC13, LOW); //set PC13 to 0v
}
x++;
}
}
-- edited by rufnek on Apr 01 2019, 02:34 PM
-
piLio
on
09 Apr 19 @ 04:02 PM #
Exhaust Fan Blade Balancing
masisira agad bearings dahil sa unbalanced fan blades
electrical tape for balancing

-- edited by piLio on Apr 09 2019, 04:03 PM
-
AmalgamvsAloof
on
14 Apr 19 @ 05:21 PM #
I have an old 4D cell incandescent lantern converted to LED.
cellphone battery attached to the circuit board of a powerbank, just so I can easily charge it with a micro usb and I can tell how much charge is in it. Plus I cannibalized all the old crappy LED flashlights I had and used the LED emitters
This is a light meant to be a test bed, something I can fool around and experiment with.


My problem is, sometimes when fooling around, I accidentally short it. The battery dies. Waiting 15 min does nothing. The thing that works for me is to unsolder one wire from the battery then wait 1 min. Is there any better way to revive the battery after a short?
-
awakeruze
on
14 Apr 19 @ 05:24 PM #
That's one butt-ugly hack. :P
But if it works, I have no quarrel with it. :D
-
AmalgamvsAloof
on
14 Apr 19 @ 06:27 PM #
either ugly or I throw away perfectly usable LED emitters
-
awakeruze
on
14 Apr 19 @ 06:49 PM #
^
Perhaps some PVC pipe + fittings could be used to make a flashlight body.
I've already given it some thought TBH, but then I found a relatively bright LED flashlight at Japan Home that has variable focus and fits one 18650 cell without any modification. Bonus points with the included bike mount :D
-
ututin1
on
05 May 19 @ 11:59 PM #
resurrected my 11-year old hp mininote 2133 netbook from the dead last year. its problem was too much heating of its hard disk and cpu. my solution was since it has a full-body aluminum frame, i thought of using it as its own heatsink.

and i used aluminum shims to act as heat media for transferring the heat coming from the cpu and hdd.

-- edited by ututin1 on May 06 2019, 12:01 AM
-
ututin1
on
06 May 19 @ 12:00 AM #
used some thermal tapes to pin the aluminum shims down against the aluminum frame.

and finally, installed linux lite 32-bit and dual-booted it with windows xp.

now my cat can sleep soundly in cat heaven! hehe

-
piLio
on
04 Jun 19 @ 11:45 AM #
sa mga gumagamit ng LVDS, ok pa kaya panel ko?
hindi ko alam if PSU or driver ang may issue. tingin niyo?
Dell P2214Hb
<click here for link>
-
awakeruze
on
25 Jun 19 @ 09:48 PM #
Friend bought a casing with a bottom PSU mount, but it turns out the cables for the +12V power connector on his current PSU were too short. We couldn't find any cable extenders in the PC stores we visited.
Rather than buy a new PSU, we decided to extend the cable ourselves by splicing the cable. We went to Ace Hardware and bought the ff:
1 meter #18 AWG duplex wire black (for GND)
1 meter #18 AWG duplex wire white (for +12v)
1 pack heat shrink tube
1 60w soldering iron
soldering wire
Total cost was below 700 pesos, but most of that was due to the soldering iron. Had I brought my iron the cost would have been a little over 200.
The PSU and motherboard had two 12V power connectors (8 pins total). We extended them by half a meter. The duplex wire made it really neat.
-
awakeruze
on
02 Jul 19 @ 06:03 PM #
I acquired two broken USB wifi adapters from one of my clients
One had the USB connector ripped out, the other lost the antenna (and the RP-SMA jack).
The first one was a lost cause, but the second one still worked and can actually detect networks-- very weak, of course, and can't connect at all.
So I inspected its circuit board and found out that the solder pad for the center pin of the RP-SMA antenna jack was gone (ripped out along with the jack itself). But I noticed that there there was a via which lead to a circuit trace to the underside of the circuit board (the wifi adapter has a double-sided PCB). I was pretty sure it's for the antenna signal, so I hatched a plan:
1. I desoldered the RP-SMA jack from the first adapter
2. Lightly scratched the circuit trace to expose the copper so I can solder on it
3. Installed the RP-SMA jack upside down so its center pin lines up with the exposed copper trace.
There was a 1mm gap between the center pin and the copper trace, but I managed to bridge it with solder. Then soldered the antenna jack's ground legs to complete the connection (and of course for mechanical support).
I'm currently testing it right now on my laptop (with built-in wifi disabled), and it's working without issues. :D
Now I only need to find a new cover/enclosure for it-- the client also broke/lost the plastic enclosures of the wifi cards. *sigh*
-- edited by awakeruze on Jul 02 2019, 06:16 PM
-
AmalgamvsAloof
on
14 Aug 19 @ 07:19 PM #
Powerbank na nabibili sa SM department store, near the school supplies. PHP 300 but 30% off. I think there were like 15 left and all but 2 were totally drained.
Plastic case is easily pried open. Claimed capacity 4000 mah. I don't know how accurate the charging amp meter app on my cellphone is but I get only 1000 or so mah. So 350 or so mah for each cell?
You can use them for spare parts. I will use the low capacity cheap 18650 batteries for 18650 flashlights that dont need high capacity, saving my good 18650 cells for times when they are needed


-- edited by AmalgamvsAloof on Aug 14 2019, 07:21 PM
-
awakeruze
on
20 Aug 19 @ 05:29 PM #
Got a free Pentium M laptop from a client. Some keys are hard to press, turns out there are staples under them-- laptop was used in an office for years so it's not surprising.
Used a thin magnet (taken from a laptop hard disk) and ran it through the gaps between keys. Removed 3-4 staples this way. :D
-
AmalgamvsAloof
on
22 Aug 19 @ 04:08 PM #
this is where the board of the powerbank above went

this used to be a rechargeable fan and light. The fan died. The light works but annoyingly, when used the light is full brightness only for say 15 min then it drops noticably in brightness.
I sawed off the fan long ago. I swapped the lead acid battery for an 18650, and soldered the power cables going to the light's circuit board/switch to the back of the USB-A female port.
The original circuit board and buttons still work on the light so the original function of full power - slightly dimmer light - off still works. But now I can charge via micro usb and since the usb port works, its also a power bank
-
awakeruze
on
22 Aug 19 @ 04:50 PM #
Nice. :D
-
rufnek
on
29 Aug 19 @ 09:47 AM #
Got a free Pentium M laptop from a client. Some keys are hard to press, turns out there are staples under them-- laptop was used in an office for years so it's not surprising.
Used a thin magnet (taken from a laptop hard disk) and ran it through the gaps between keys. Removed 3-4 staples this way. :D
ayus! saved you from buying replacement keyboard. Sakin naman nag stick yung arrow up key
Nice! keep it up guys
TRRS to TRS Headphone + TRS mic
Vics vaporub mod hehe
The TRRS jack donor - broken samsung phone (i'll be glad to send the rest of this sa sinu mang kelangan ng board samsung s9300 but sagot nyo shipping)


Sira lang ng phone dati is broken lcd pero gumagana pa sya. PM lang kung need nyo board
-- edited by rufnek on Aug 30 2019, 04:46 AM
-
dayamos
on
19 Sep 19 @ 11:56 AM #
Mga masters, advise lang :)
Okay ba gamitin itong epoxy brand na ito to repair plastic LCD back cover ng laptop? If yes, matibay/tumatagal naman ba?

Balak ko sana mag-DIY, nag crack yung mga pinagkakapitan ng hinge screws dun sa plastic lcd back cover. Will be using epoxy to repair the screw holes, parang ganito:

Maraming salamat sa mga tutulong :)
-- edited by dayamos on Sep 19 2019, 02:02 PM
-
awakeruze
on
19 Sep 19 @ 02:29 PM #
Haven't tried that particular type of epoxy, but I remember using regular epoxy and it failed. I guess it depends on the particular scenario-- in my case, I was trying to repair the screw posts for the hinge; there's a lot of mechanical stress in that area, and the plastic tended to flex, so the epoxy eventually crumbled.
In parts that don't experience much stress or load, it might work, but try to maximize the contact area between the epoxy and the parts to be glued together.
-
dayamos
on
19 Sep 19 @ 03:16 PM #
^thanks for the tip :)
Yeah, yun din actually ang concern ko, baka hindi kayanin since laging may stress dun sa area na yun.
Will probably bring it sa service center na lang, will just test and take videos of the components working sa harap nila para documented and hindi nila sabihin na meron ibang sira nung dinala ko.
-
vvbert
on
19 Sep 19 @ 03:34 PM #
try using epoxy steel. mas matigas
-
dayamos
on
19 Sep 19 @ 04:32 PM #
^oh, okay, thanks. Ito ba yun bro?
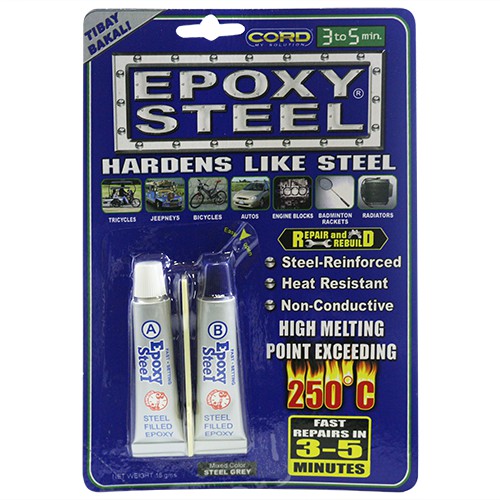
Baka pwede ko muna subukan bago ko ipagawa sa service center :)
-
ninjababez
on
21 Sep 19 @ 04:34 PM #
^ if used correctly, epoxy regular (2 small tubes) should work fine. maganda lang sa mga epoxy steel eh quick dry sila, sets in about 5 minutes pero fully cured in 24 hours din like regular epoxy
-
gtgonzales
on
21 Sep 19 @ 07:36 PM #
Nagpaayos ako sa Gilmore ng laptop hinges and, sa pagkaalala ko, Epoxy din ang gamit ng nag-ayos. Ang payo sa akin ng gumawa ay mas mainam kung marecover as much of the broken pieces surrounding the hinge/screw as possible. Ok naman ang resulta dahil tumagal naman ang inayos na laptop.
-
dayamos
on
21 Sep 19 @ 10:12 PM #
@ninjababez
Thanks for the tip :)
@gtgonzales
Ngek, naitapon ko na yung mga durog na plastic :( sabi nga ng isang kasama natin sa DIY Laptop Repair thread, mas okay daw kung yung orig na plastic ng laptop ang gagamitin pang bond ng mga brass screw holders. Anyway, thanks for the advice :)
-
AmalgamvsAloof
on
26 Sep 19 @ 09:56 PM #
in my case, I was trying to repair the screw posts for the hinge; there's a lot of mechanical stress in that area, and the plastic tended to flex, so the epoxy eventually crumbled.
I did that too for my ASUS laptop last year. But I figured this is an expensive laptop so might as well go for the top tier most expensive epoxy. Sa youtube madami ang gumagamit ng ganitong brand pag nag tetest sila kung kaya ng epoxy or hindi. No made in china cheap stuff. Made in the USA

Still solid
-
ninel
on
04 Oct 19 @ 07:37 PM #
Makikisali lang sa kwentuhan, after several years na walang post. :D Ang natatandaan ko na matibay na pandikit sa plastic ay yung pandikit ng pustiso. Acrylic powder at liquid na pinaghahalo. Nabibili sa dental supply. :D
-
AmalgamvsAloof
on
06 Oct 19 @ 03:46 PM #
I used to have a sellys brand plastic cyano acrylate glue although ewan kung available pa sa pinas. It had a small highlighter like pen that you used to coat the plastic surface with a chemical that enhances bonding. Then you place the superglue. It worked OK

